Ok y'all get a sort of precis of warping a rug loom tonight
Uncategorized
34
Posts
10
Posters
14
Views

-
And then the really slow step. You line up the heddles in frame order, one from frame 1, then frame 2, and so forth for however many frames your pattern has. Thankfully this is only four. Then you pull the warp through, and it's absolutely critical that you line up the beater order with the heddle order because nothing works if you have a crossover. This is way easier with two people. You pull thru a small number, in this case 12, line up the ends, and tie them off in groups.
@smellsofbikes
that's a great ring -
And then the really slow step. You line up the heddles in frame order, one from frame 1, then frame 2, and so forth for however many frames your pattern has. Thankfully this is only four. Then you pull the warp through, and it's absolutely critical that you line up the beater order with the heddle order because nothing works if you have a crossover. This is way easier with two people. You pull thru a small number, in this case 12, line up the ends, and tie them off in groups.
This is about halfway through warping up. The tied off ends then get tied to an apron bar hanging below the weft spindle. This helps keep tension equal. (Different yarns have different stretch characteristics.)
-
This is about halfway through warping up. The tied off ends then get tied to an apron bar hanging below the weft spindle. This helps keep tension equal. (Different yarns have different stretch characteristics.)
It is traditional that the house pet gets tangled up in this process. At this point you yell "dog in the warp!" (Or cat...)
-
@smellsofbikes
that's a great ring@hobbs it MOVES.
I've shown people how you can use it as a slide rule if you only want to multiply by two. But it also is very useful in explaining how a car differential works because that's what it is. -
Then once you have all the hanks you need, you tie one end of each to the cloth beam and take the other end and pull it a bit apart and pull each strand through the beater comb. I 3d printed a tool to help with getting them through the beater. It also does heddles (next step.)
This pic has 3 kilometers of yarn just for the warp.Some of the strands in one of the hanks at the far end, the more pale ones, are from a ball of hand spun yarn that @theantlady sent us! Community!
-
It is traditional that the house pet gets tangled up in this process. At this point you yell "dog in the warp!" (Or cat...)
anyhow this is where it's sitting for tonight. Tomorrow probably we finish the heddle part and start working on pulling the whole warp through onto the warp spindle, and then the actual weaving starts.
-
@hobbs it MOVES.
I've shown people how you can use it as a slide rule if you only want to multiply by two. But it also is very useful in explaining how a car differential works because that's what it is.@smellsofbikes i love it
-
 undefined oblomov@sociale.network shared this topic on
-
Some of the strands in one of the hanks at the far end, the more pale ones, are from a ball of hand spun yarn that @theantlady sent us! Community!
Thank you for the photos and the explanation! It's so exciting to see this getting underway. :^D
-
Ok y'all get a sort of precis of warping a rug loom tonight.
You set up a warping board, like a peg board. However big your blanket is going to be, divide it down into manageable hanks, like 20-50 warp strings per hank. You stretch each one in a z pattern on the warping board so they're all piled up but no strings cross. Then you pull all that off and loose weave it into a chain so you can pull the strands out but the whole hank doesn't tangle.@smellsofbikes wait is that why they call it a hanky?
-
@smellsofbikes wait is that why they call it a hanky?
@MultimediaMage alas, no, but I like it.
-
It is traditional that the house pet gets tangled up in this process. At this point you yell "dog in the warp!" (Or cat...)
Next installation: finished loading the heddles and in the process of pulling the warp strands onto the comb before they get hooked to the warp apron.
-
Next installation: finished loading the heddles and in the process of pulling the warp strands onto the comb before they get hooked to the warp apron.
@smellsofbikes ooo, are you gonna program it to render fractals?
-
Next installation: finished loading the heddles and in the process of pulling the warp strands onto the comb before they get hooked to the warp apron.
Infeed and outfeed pictures of the warp hanks. Now it's time to start the simultaneous process of tensioning and wrapping the warp onto the outfeed spindle.
Btw last time I had the comb (whatever it's called) removed because that's where I sit pulling lines through the heddle as it's way easier on my back. -
@smellsofbikes ooo, are you gonna program it to render fractals?
@RueNahcMohr that would be so cool
-
Infeed and outfeed pictures of the warp hanks. Now it's time to start the simultaneous process of tensioning and wrapping the warp onto the outfeed spindle.
Btw last time I had the comb (whatever it's called) removed because that's where I sit pulling lines through the heddle as it's way easier on my back.And here's the spindle apron all ready to go!
-
And here's the spindle apron all ready to go!
Combing out the wriggly bits in the warp before starting to pull it through. This takes a lot of patience and is an ongoing task: pull a meter or so through, comb more, pull more through.
-
Combing out the wriggly bits in the warp before starting to pull it through. This takes a lot of patience and is an ongoing task: pull a meter or so through, comb more, pull more through.
Oh hey heres a way better pic of the warp spindle comb and apron. You can see how everything works better
-
Oh hey heres a way better pic of the warp spindle comb and apron. You can see how everything works better
This part is stressful: getting all the warp strings with similar tension as they're pulled through. On the warp beam, as we're pulling the warp through, I'm adding sticks between layers of warp so the layers don't tangle or stick together on the beam.
-
This part is stressful: getting all the warp strings with similar tension as they're pulled through. On the warp beam, as we're pulling the warp through, I'm adding sticks between layers of warp so the layers don't tangle or stick together on the beam.
This is the warp beam with about 80% of the warp wrapped on it.
-
This is the warp beam with about 80% of the warp wrapped on it.
in other words, it is a warp core !
Gli ultimi otto messaggi ricevuti dalla Federazione
-
rust-to-C transpiler
-
Gianluca 🦋 (@handle2912.bsky.social)
https://bsky.app/profile/handle2912.bsky.social/post/3mgk3hrfjq224
> Smog. Smoke (Fumo) Fog (nebbia) = FUBBIA Uscire dalla fubbia Uscire dalla nebbia
-
Non basta una vita per superare le disuguaglianze.
Disuguaglianza di genere e invecchiamento
#disuguaglianzedigenere
https://feliciapelagalli.nova100.ilsole24ore.com/2026/03/08/non-basta-una-vita-per-superare-le-disuguaglianze/
-
Decisamente godibile!
Trovo che Emma Stone sia davvero brava, Jesse Plemons decisamente credibile nel ruolo e Aidan Delbis mi ha quasi fatto versare un paio di lacrimucce...
Consigliato!
Ora mi tocca vedere il film originale coreano, "Jigureul jikyeora!" 😈
Mi sembra sia stato pubblicizzato poco ma sono "fuori dal mondo"* quindi potrebbe essere una percezione mia.
#film #scifi #bugonia #cinema #movie #complottismi
-
«C’è un’urgenza, nella letteratura recente, di raccontare le storie sommerse del disagio mentale. Sono i racconti di persone in cura o ex pazienti, ma sono anche i diari o i resoconti di medici, psichiatri, specialisti che ricostruiscono la loro esperienza clinica. Oltre a questi ci sono i romanzi composti dallo sguardo di chi cerca le tracce degli ex internati per riportarli alla luce. Cartella clinica di Serena Vitale è uno di questi.»
#storia #Salute #psichiatria
https://antinomie.it/index.php/2026/02/11/immagini-da-una-malattia/
-
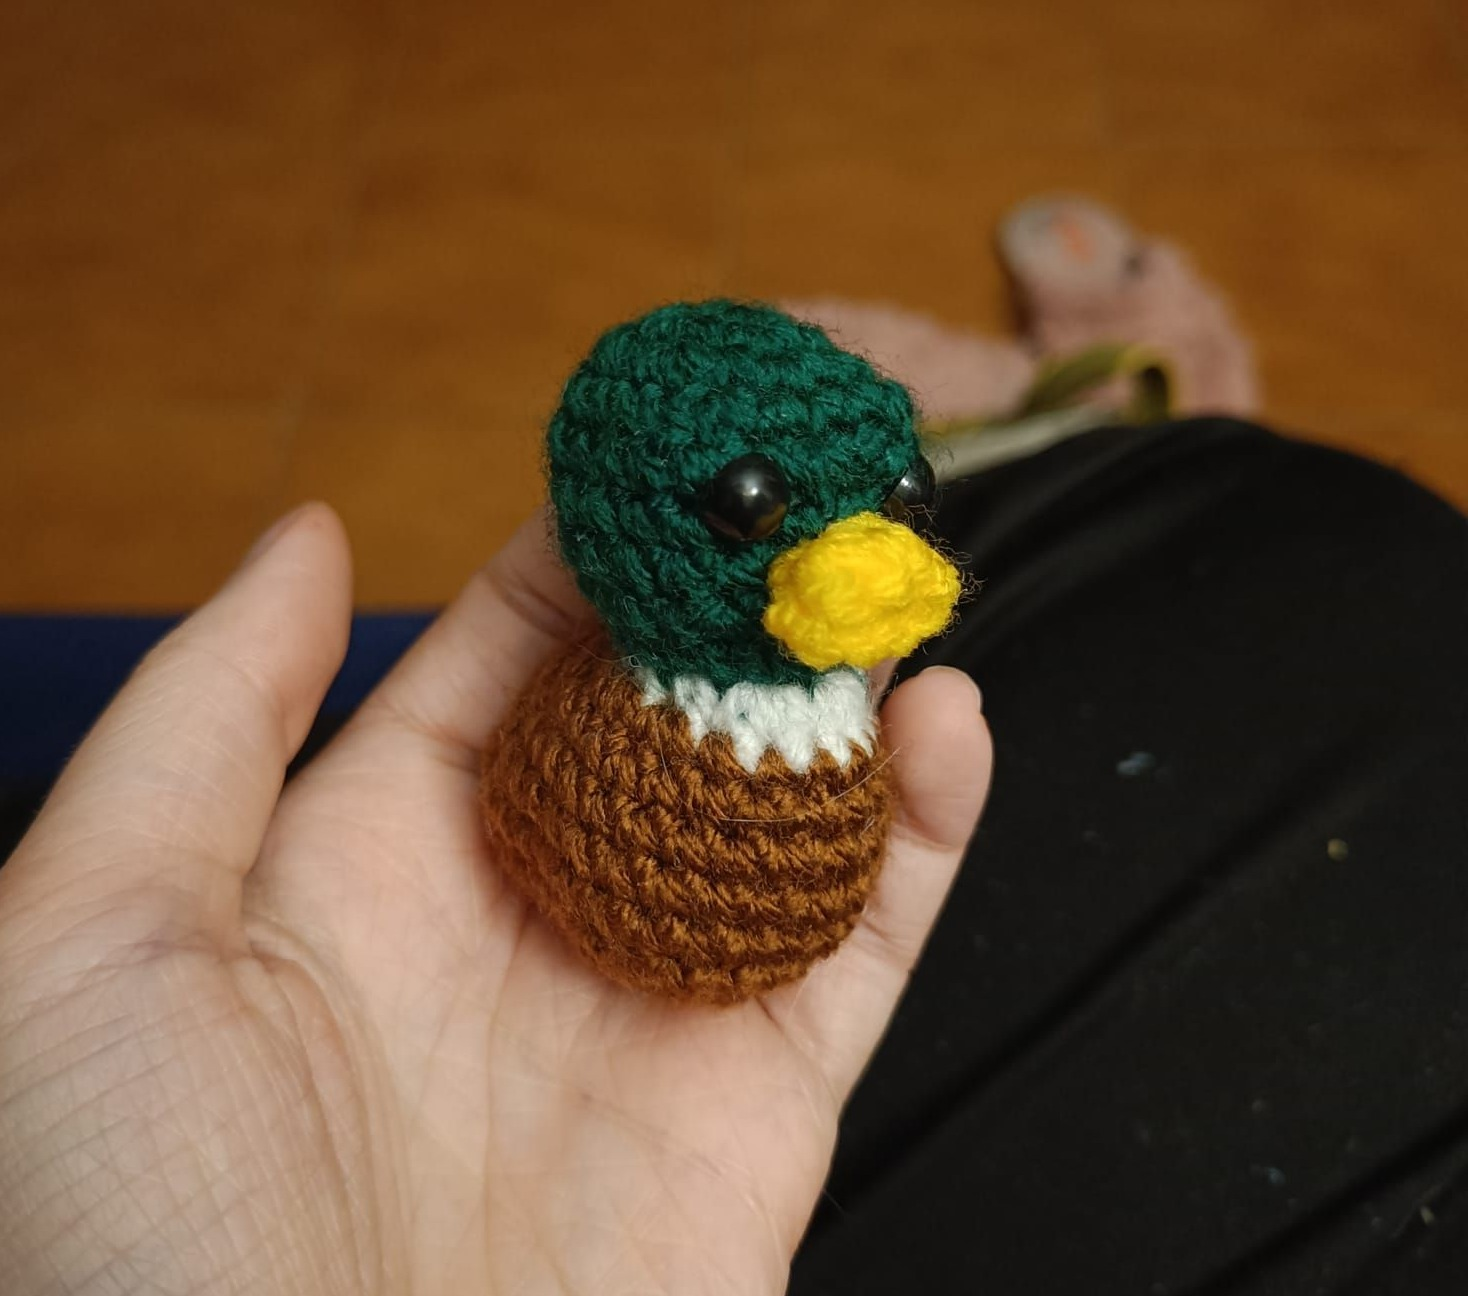
Da qualche giorno sto (re)imparando a fare gli amigurumi.
Le istruzioni dicevano "venti minuti". Io ci ho messo due ore e mezza.
Pro: in quelle due ore e mezza praticamente non ho pensato a niente.
Contro: è venuta tutta storta, povera bestia.
-
@garantepiracy.it sì, questo viene detto anche dal team Proton su Reddit
https://www.reddit.com/r/ProtonMail/comments/1rlt75p/comment/o8xtkgt/
-
This post did not contain any content.